Do it yourself – the User Testing Toolbox

Our team is at WordCamp Europe in Berlin and this article covers the contents of my Workshop from Saturday. The goal is to motivate developers and designers to get started with user testing. Even if the project is on a tight budget, we should never dismiss testing our work on an actual target group.
WHY
To run an effective usability test, you may automatically think of formal usability tests in a professional laboratory setup. But there are a lot of other ways and reasons, how and why we should test our digital products on users. How about looking at user testing on a different perspective?
Show usability flaws
What if you have a pitch for a potential client and you want to point out that the user experience of their beloved interactive product may have some flaws. I made the experience that it’s easier to do some quick user tests to gather the feedback from the users to showcase the conversion problems their business are facing.
Gain trust as an expert
User testing can also be very handy if you have to integrate yourself in a clients team. You may already have made an expert review of their project and made up your professional opinion. At some point, you have to confront their product owner, marketer or even designer to deliver the identified problems. With user tests, you will get much more acceptance, because it’s not you who is telling the story, but the users.
Validate your idea
It is important that you validate your idea early on, to know if your concept actually works. We all have been there, time constraints and small budgets are hindering us from doing user testing and suddenly our project is live and we move on to the next project. This is especially true in agency work. But user testing should be an integral part of your design process.
User testing should be happening at every point in the process as an integral part of an iterative design process.
Christopher Murphy
WHERE
At coffeeshops with random people
Sometimes it’s very refreshing and inspiring if you head over to a coffeeshop and ask random people about your idea. This could be done with a simple sketch or paper prototype and some short questions. You will be surprised how open and interested people are, once you are leading them into your world of creating digital products. If you work in an office it’s simple, just go next door and ask a colleague if she or he could have a look at your concept. This is also known as hallway testing.
Hallway testing is a quick and cheap method of usability testing in which randomly-selected people—e.g., those passing by in the hallway—are asked to try using the product or service
en.wikipedia.org
In a familiar environment at home
Participants will quickly get nervous or uncomfortable if you face them with a video camera or even if the room is packed with observers rather than the two of you. Also, the test would not be very effective, if your participants has to complete their tasks on an Apple Computer if she or he is used to a PC. In short, not everyone knows how to scroll on a MacBook where the scroll wheel doesn’t exist and scroll bars in certain browser only show up while scrolling. Consider doing a test remote, where participants can be in their familiar environment – on their computer at home. This test would be known as remote user test.
Remote Testing is a scenario where usability evaluators, developers and prospective users are located in different countries and time zones.
en.wikipedia.org
With context aka the reality
You may come up with a concept where your interface will be used on the go or outside a normal office desk. Last year I worked on an iPad Application for construction managers. Their daily business takes place in a noisy and constantly changing work environment – the construction site. Such usability tests are better to be executed on site, where users will eventually use the application.
How
Preparation is key
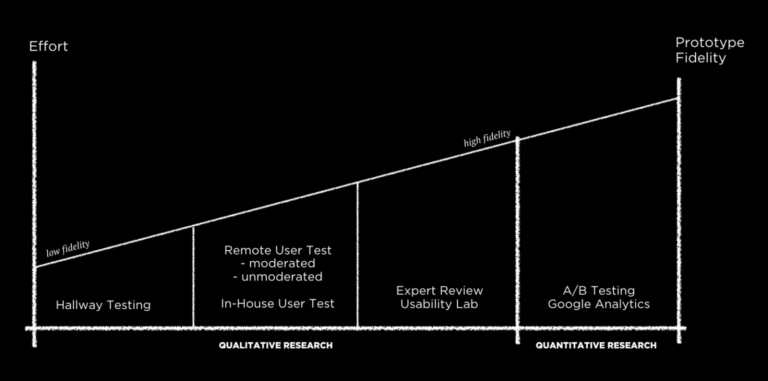
At one point you have to decide how you would present your new idea or concept to your test participants. Whether it is a sketch, mockup or already coded with HTML. The following chart will give you a simple overview on the different types of tests with its effort and prototype fidelity.
The Setup
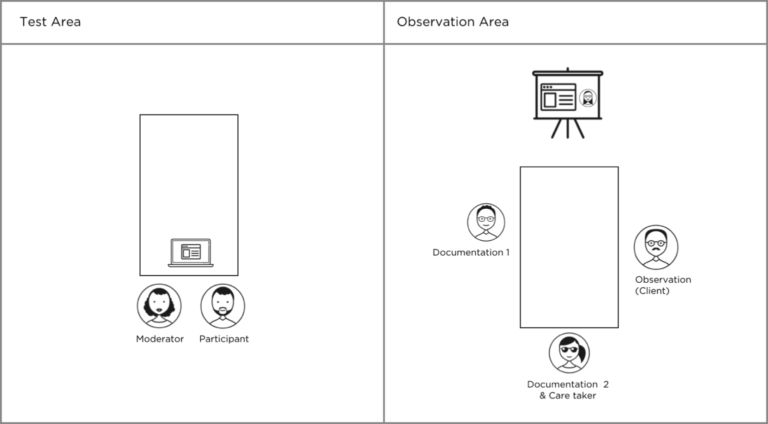
If you want to meet your participants in person, it is far better to bring them to a neutral place, for example in a meeting room of a co-working space or in your agency. Participants will be more neutral and honest if they aren’t at your clients well known product company. To make sure participants feel as comfortable as possible, observers should not be in the same room. As you would have a bunch of participants planned to come to the test, organise a care taker who would welcome other participants, if they show up too early – they always do!
Inhouse
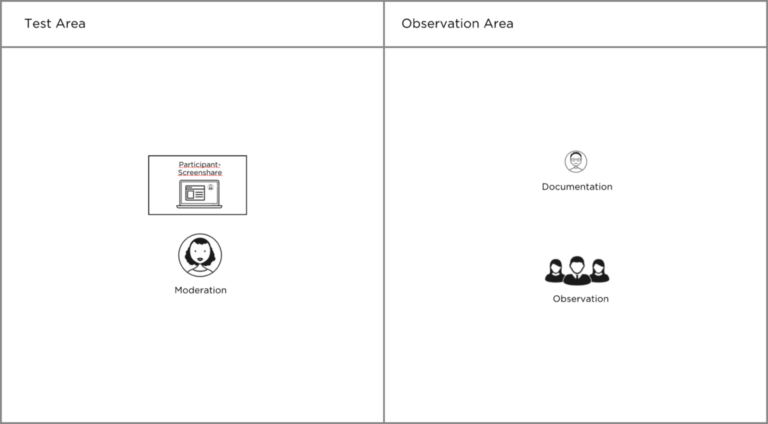
Remote
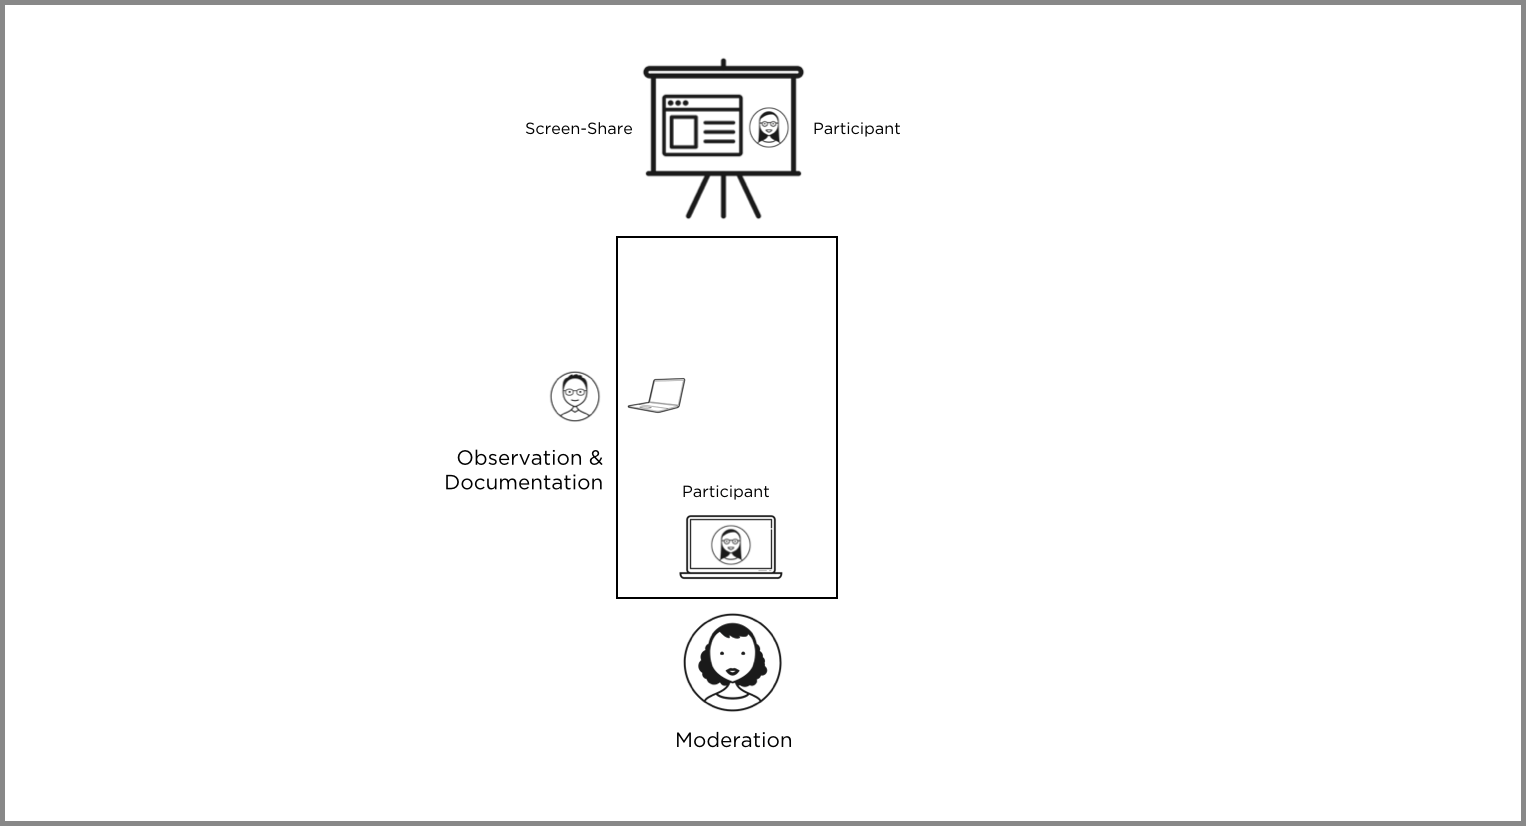
Planning your first test
1. Recruit Participants
In my experience 3 to 5 Participants will get you a brief feeling of whether your concept works or not. In this article I will not cover how to recruit participants, but there are tons of articles about this topic, one of them is the article DIY Recruiting: How to Find Participants for Your Research from Ania Mastalerz.
The best results come from testing no more than 5 users and running as many small tests as you can afford.
Jakob Nielsen
2. Come up with an hypothesis
The hypothesis helps to assess the testing purpose of each task to be tested and gives you an orientation of how to validate the findings in the test. In the workshop at WordCamp Europe, we discussed about what the users would expect if they use the star-icon next to the sessions on the conference website.
3. Compose the test script & report
A typical test script consists of a Q&A in the beginning, as a warm up, a main section and a Q&A for cooling down. It contains between 3 to 5 tasks, and the test itself lasts between 30 to maximum 60 minutes. It serves as a guideline for the moderator and should not be shown to the test users. Get a copy of the example test script we used in the workshop, where we composed a test about the star-feature on the sessions page.
4. Organise someone to observe
You will be very busy moderating the test and as it would be a bad idea to take notes in front of the participants, it’s better to organise someone who would observe the complete test. An observer is in charge of the documentation for the evaluation later on. That’s why it is important to provide a proper template for the test report. Get a copy of the example test report we used in the workshop.
Running the test
Before you begin your test, make sure to get everything organized and in place. I always have a todo list at hand, because things can quickly get very busy and you will loose focus, especially if there are some issues with the Wi-Fi for example. Record each usability test you run, so that you can look back through it later and undertake some analysis. If you’re recording the test, it’s important to ask your participants for permission.
A user interface is like a joke. If you have to explain it, it’s not that good.
Many said it
Just give it a try – good luck!
Photo by Susan Holt Simpson on Unsplash
Get in touch
Want to join our team or work with us on your next project? Get in touch!